
Creating your Interactive Smart Home Floor Plan: Part 2

Welcome to the second part of this series to create your own Interactive Smart Home FloorPlan. This episode of the guide will focus on creating your own floor plan in Sweet Home 3D, so if you've not already downloaded and opened it, go right ahead and do that, then meet me in the next section.
First things first - Furniture and Textures
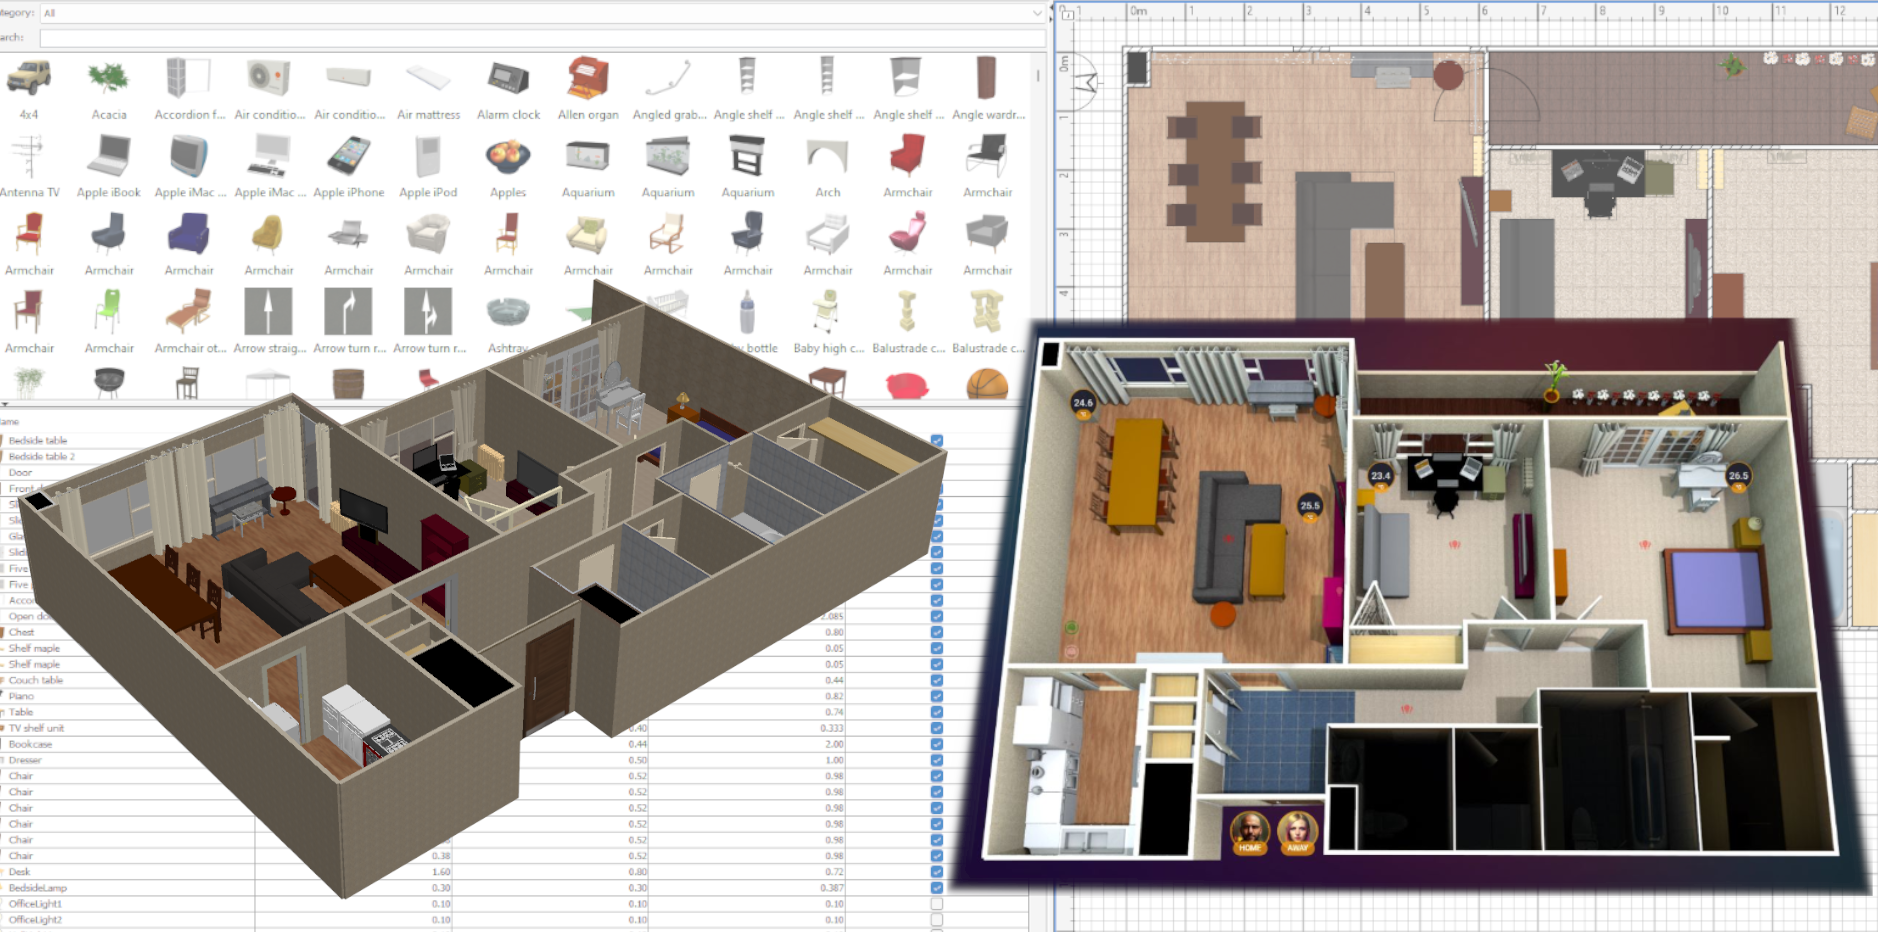
When you first open Sweet Home you'll be shown the default layout view split into 4 distinct parts, something like this (I've highlighted and named the different areas):

The first thing we want to take a look at is increasing the furniture/objects library.
- Click
Furniturein the ribbon at the top, then clickImport Furniture

- In the splash screen that pops up click
Find Modelswhich will open a new browser tab

- Browse or download as few/many of the zips on this page as you want, as well as visiting the other sites with 3D models to download theirs
- Back in Sweet Home, open the
Furnituremenu again, and this time clickImport Furniture Library

- Navigate to and select the library you want to import, repeating for as many libraries as you want
- Repeat this process for textures (to be able to customize your wall/floor patterns and textures)
Preferences
At this time you may want to go to File > Preferences to take a look at what options you have, such as changing measurement units, the language, centering the 3D aerial view on what you select in the canvas, default wall dimensions, plus more.
I do recommend selecting Aerial view centered on selection.
Creating a Room

To start with we'll mostly be using the tools indicated above, with creation mostly taken care of by the Create walls and Create rooms tools:
- Select the
Create Wallstool and create your first enclosed room space. This is done by clicking a starting point, then moving the mouse to the end of one wall length and clicking again. Continue to make the shape of the room until you're back where you started

- To stop drawing walls, press the
Esckey on your keyboard - Switch to the
Create roomstool and click on each corner of your room. It is best to follow the same route you took creating the walls (i.e. if you went in an anti-/counter-clockwise direction, do the same with the room creation)

- Note how the cursor will snap to a corner, use this to your advantage
- Select the
Selecttool (the pointer) and now double click inside your room to bring up the modification options - Here you can change things like name, floor and ceiling colors or textures, as well as various other options you may want to play around with
- You can also change the texture for
Wall sides around room

- Once you're happy click
OK - If you want to add texture to the outside of the walls, you will need to follow the same process (you can select multiple walls at a time by using
Shift + Clickand then right clicking one of the selection and choosingModify walls - Provided you enabled
Aerial view centered on selectioninPreferences, if you now click on the Canvas anywhere outside of the room, your 3D model should center on your room

Before we proceed, select Plan > Lock base plan. This will lock your rooms and walls, meaning that as we go through the next section of the guide you won't change this layout by accident. Don't worry, you can always unlock it in the same place when you want to add or modify your walls and rooms.
Adding Doors, Windows and Furniture
At its simplest, this is as easy as searching for what you're looking for in the Furniture area, then doing drag & drop.
Let's add a front door:
- In the
Categorydrop down at the top of theFurniturespace, selectDoors and windows - In the
Searchbar, typeFrontand your options will show up

- Play around with this a little, noting how the program helps to snap the door to a wall, and also shows you distances from perpendicular walls
- When you've found the right place but need to change the door orientation (for instance it swings outwards rather than inwards as shown above) you can right-click on it and select
Flip vertically/horizontally

- In the same way, you can search for and add windows and furniture to your room. You can also double-click them to change some of their properties. Go ahead and do that until you're happy with your room, then click outside the room on the canvas

Now that we've added some objects to the room, note the quadrant I initially called Parts List - here we have a list of the items you've added to your home, including some basic dimensions and a toggle which includes or removes them. It's not possible to change the dimensions directly from the parts list, but you can double click an item in the list to get into the object properties.
Adding Lights and exporting your first image
- Select
Lightsfrom theCategorydrop-down box, and clear the search bar
Here you can browse a lot of different types of lights, and it's worth noting that most ceiling lights will by default be put at ceiling height when you drag them into the canvas. Similarly, most floor or desk lamps will also, by default, be at a somewhat suitable height, but as with all things you can modify this as necessary.
- Add all the lights you have wireless control over, be they ceiling lights, lamp lights, and controlled by Bluetooth, WiFi, Zigbee or other
- Try and do your best to position them as accurately as possible to your own home

Here I've added a a floor lamp top left, a little coffee table and lamp next to the sofa, and then 3 halogen bulbs (visible as small squares in the canvas plan view).
- Double click any of your lights
- Note the
Light power (%)in the bottom right corner
We can leave it at the default 50% for the moment, but as we export our images you may want to play with this.
- Click
3D view>Create photo

Notice the Quality slider, and how as you move it towards Best you get more options, specific to Date, Time, Lens and Renderer. These options are required, so make sure to select Best or the next step down.
- Change the pixel
WidthandHeightfields to be closer to what you need. 1920 x 1080 will give you a standard HD screen size for instance (you will need to uncheckApply proportionsto achieve that) - Let's change the time to 22:00, and make sure
Add ceiling lightsis checked - Click
Createand watch it render your image

- Save your image in a suitable folder. Let's name it 'home_10pm_all lights on' and save it as a png or jpg
A couple of things to note here:
- The viewpoint will be exactly as it is shown in your
3D Viewquadrant of the main Sweet Home screen - Light spills through shadows and any open doors, and is also affected by furniture (line-of-sight is employed)
- Changing the value of the
Light powerfield in each light will change how strongly it will shine in your render
Creating images for each possible on/off lighting state
By checking or unchecking the boxes in the Visible column in the Parts List quadrant, we can select which lights we want to be visible in the render.

Floor uplight is selected
Floor uplight is renderedLittle lamp visibility, it removes the light from the render, but also removes the lamp itself. This may not be desirable, so another way to keep this lamp but turn the light off is to double-click it and change Light power to 0The Compass
You probably noticed the compass on the Canvas. If you didn't, it's this:

You can change the direction of North using this compass to more accurately reflect the orientation of your home in relation to the sun. This will add realism to your renders for different times of day.
- Unlock your base plan by clicking
Plan>Unlock base plan - Single click the compass to select it, then click & drag at the bottom to change the direction

Creating all required renders for GIMP
Once you have your home laid out, with furniture, textures, objects and lights as you want them, you're ready to create all renders required which we will modify using GIMP in Part 3 of this series.
- Click anywere on the Canvas outside of your home
- Click & drag in the 3D view until you're satisfied
- Click
3D view > Store point of view Now if you change the PoV by accident, you can recall it by clicking
3D view > Go to point of view and selecting your saved PoVSave the following renders
All Lights OFF
- Time: 09:00 (home_morning_lights off.png)
- Time: 13:00 (home_afternoon_lights off.png)
- Time: 18:00 (home_evening_lights off.png)
- Time: 22:00 (home_night_light off.png)
- Make a duplicate of number 4, and name the file
home_transparent.png
Creating
home_transparent is very important, so don't forget itIndividual or groups of lights as required
The above generally means 'each light or group of lights on one individual switch'.
- Create a set of individual lights/group of lights per room with the time set to 18:00
- Do the same for the time set to 22:00
- Label them accordingly (for instance
home_evening_bedroom lights onorhome_night_coffee table light on)
We've reached the end of this part of the guide. If you've come this far, you should soon have a folder of renders looking a little like this:

Thanks for following along, Part 3 of the series is just around the corner...
Related Articles
 PTS
PTS PTS
PTS PTS
PTS