
Creating your Interactive Smart Home Floor Plan: Part 3

Today we'll focus on fine tuning our images before we get into Home Assistant itself. Thanks for coming on this journey so far, only a little bit left to go.
At this stage you should have a good understanding of what we're trying to achieve (because you've read Part 1) and you've got a whole lot of rendered images from Sweet Home 3D which looks amazingly similar to your home (because you've read Part 2).
Now, you've got GIMP downloaded and are ready to edit these images so that when we get them into HA all of this work is going to pay off.
Editing in GIMP
Importing your images
- Open GIMP from its executable (so that it opens with no projects or images showing)
- In file explorer or finder or whatever you use, open the directory you saved all your Sweet Home renders to
- Highlight/select all of your images, then drag and drop them into GIMP

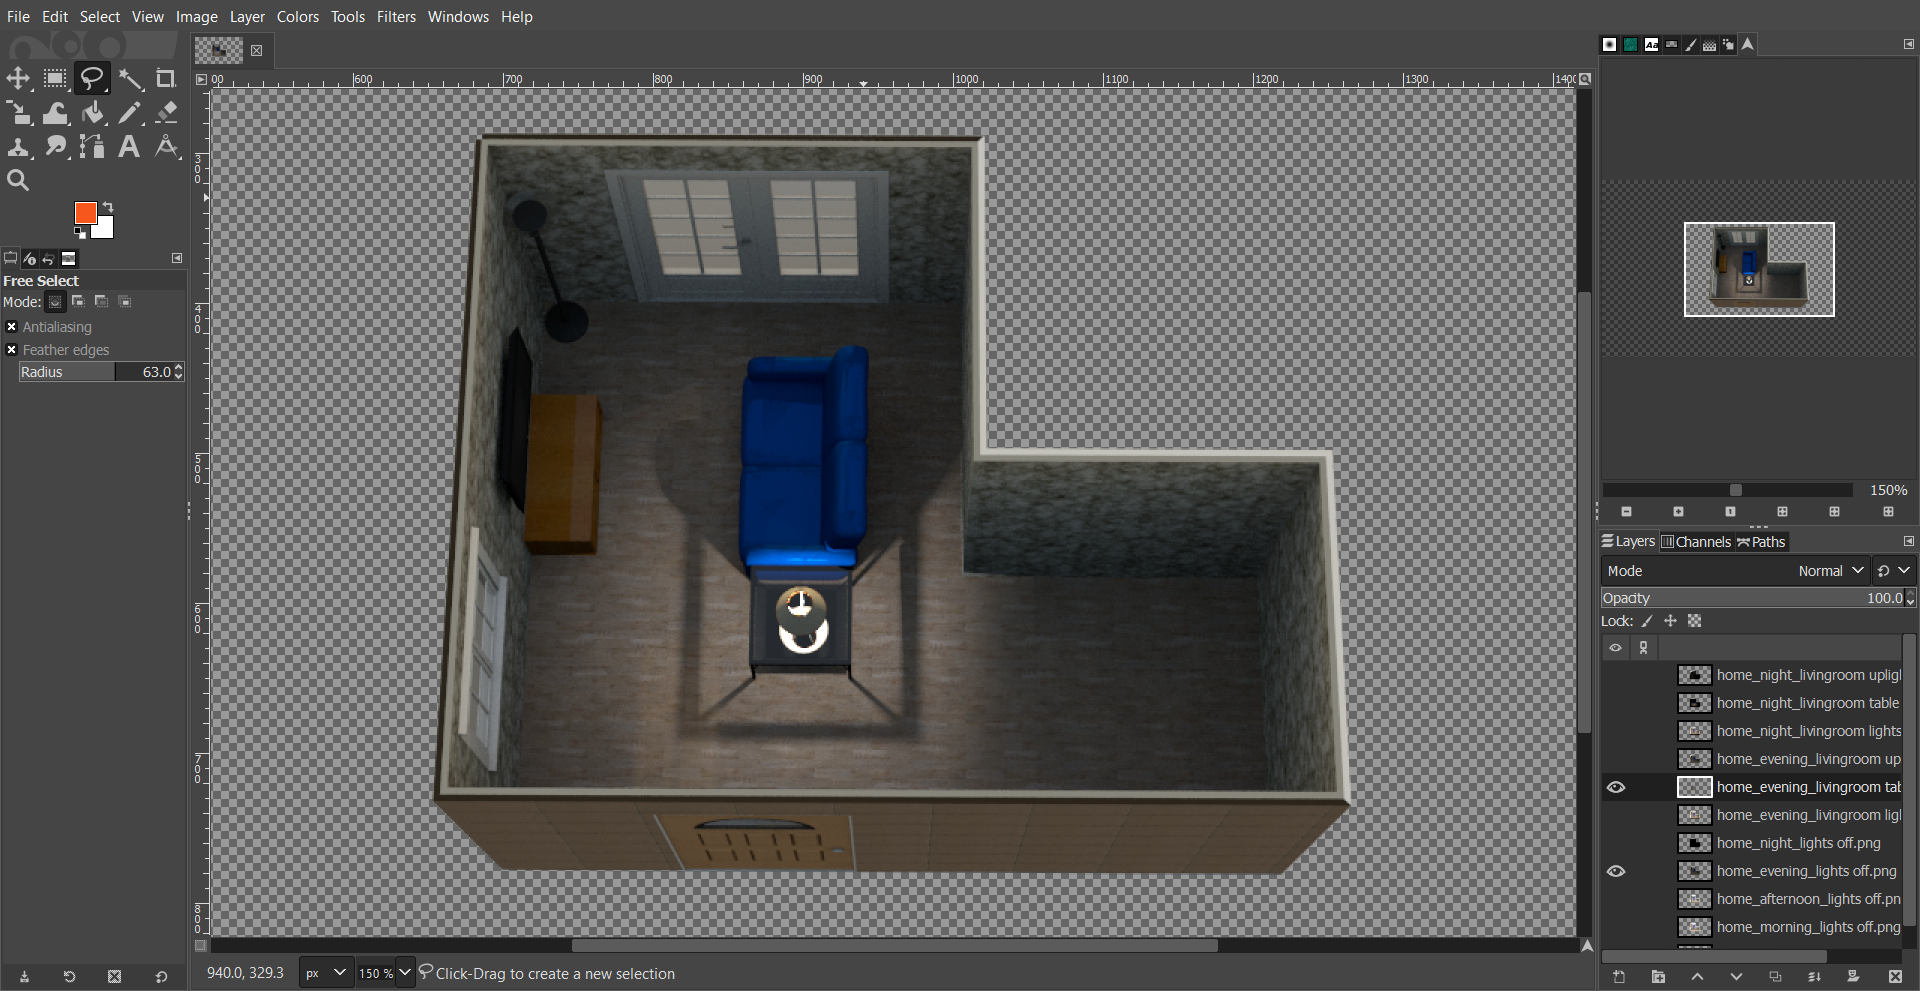
Regardless of how you've laid out your view, make sure you're able to see your layers view, which should populate and look something like the above.
Changing the layer order
The layer at the top is visible over the layer at the bottom. A standard image editor function. This is totally up to you, however I prefer to group the layers so that
- the
transparentnamed image is at the bottom - the
lights offimages from morning through to night are above it in order, and - the
eveningandnightlight-specific images are at the top
To move these around is as simple as click & drag.
Adding an alpha layer (transparency) to all layers
To add transparency to a layer, right click on it and select Add Alpha Channel.

- Do this for all layers
Cropping all layers to show only your home

Next to each layer is an eye toggle button. When shown, the layer is visible and when toggled off it's not.

- Toggle the
eyeoff on all layers except yourhome_morning_lights off.png - In the
Selection Toolspalette top left, click theFree Selectiontool which looks like a lasso
We want to create a selection which includes the outer walls of your image, but doesn't include the shadows.
- Similar to when we created the walls in Sweet Home, click on the outer edge of one corner, then click the end of that line
- Continue to click at every corner/change of direction until you're back where you started

- The final click should be on your first location, at which point the shape will be complete and the selection will be shown with an animated dashed line
- Press the
Enterkey

- This has selected everything inside the dotted line. We want to select everything outside, so on the top toolbar, click
Select>Invert - In the
Layersdrawer on the right, make sure yourmorninglayer is selected - On your keyboard, press
Deleteand you should see the rest of the image disappear:

- Click on each other layer in the
Layersdrawer, and pressDeletefor each one - Press
Ctrl+Shift+Aon your keyboard to clear the selection from the screen
Now which ever layer you view (toggle on the eye button) all of them will only show your home layout without a background.
Top tip: When you have made a selection and pressed
Enter, you can then hold down the Shift key to begin another selection without affecting the first. Continue until you've made all selections before pressing Select > InvertWe need to completely delete the content on the home_transparent layer.
- Select that layer, and press
Delete
Cropping the 'lights on' layers
Some lights such as ceiling lights change the look of a whole room, and if there is no window or open door for the light to spill through, we can keep the whole room only (for instance, crop the home_evening_bedroom lights on layer to the bedroom only.
- If you have any rooms like this, go ahead and crop them in the same way we did the other layers
- Don't forget that as well as the
eyeneeding to be toggled on, you also need to have that layer selected
Where light spills through to another room, or lights such as lamps have a major change on the part of the room closest to them, but little to no effect on other parts, we don't want to keep whole rooms. To crop these layers properly we'll still use lasso and invert, but we're going to use a couple more tools here to soften the edges.

- Toggle on your
evening lights offlayer, and select anevening'lights on' layer which has light spill or is a lamp (I've selected the table lamp layer)
This may take a bit of trial and error, however where there is light which essentially just dissipates (such as to the right of the room) we want to feather those edges.

- Select the basic areas of light, capturing just a bit of shadow where the lights seems to fade away, invert and delete
- Clear the selection with
Ctrl+Shift+A

- In the left hand panel there is a check button next to
Feather edges. Select it and choose an amount to feather by - Draw a box around the hard edge where you want the light to fade. When the box is complete, you'll see the animated dotted line show you the actual selection
- Make sure the selection has as much of the hard shadow line as possible, and as little of other lines you want to keep

- Make sure the correct layer is selected, then press
Deleteon your keyboard to delete the selection (you can pressDeletemore than once, it took two hits for me to be satisfied with the result)
By toggling the 'light on' layer on and off, you can see how it will look when put into Home Assistant.
- Follow this process for all 'light on' layers
- Finally, above the
Layersdrawer on the right, double click the100.0on the opacity slider and change it to somewhere between 30 and 50 for all 'lights on' layers (you will need to play with this to see what works best for you)
Exporting your completed layers
By clicking File > Export As, GIMP will render any layers which are toggled on.

- Select a single layer, toggle it on, then click
File>Export As - Select or create a directory (something like HA Floorplans GIMP) and name it the same name as the layer (so in the example above, I would still call it
home_evening_livingroom table light on - Repeat for all your individual layers, including the transparent one
Coming up in Part 4...
That's it for Part 3. In part 4 we're going into Home Assistant to set up your smart devices and the various sensors and config modifications we'll need to begin pulling this all together.
Related Articles
 PTS
PTS PTS
PTS PTS
PTS PTS
PTS